


In the competitive landscape of YouTube, creating visually appealing thumbnails is essential for attracting viewers and driving engagement with your content. Incorporating your face into thumbnails can enhance personal branding, increase authenticity, and establish a connection with your audience. In this article, we'll provide a comprehensive guide on how to cut out your face and seamlessly add it to a YouTube thumbnail, ensuring professional-looking results that captivate viewers and drive clicks.
1. Capture High-Quality Images:
Start by capturing high-resolution images of your face using a quality camera or smartphone. Ensure adequate lighting and minimal distractions in the background to achieve clear and sharp images that are suitable for thumbnail use. Experiment with different facial expressions and poses to find the most engaging and representative shots.
Ensure adequate lighting and minimal distractions in the background to achieve clear and sharp images that are suitable for thumbnail use
2. Use Image Editing Software:
Open your chosen image editing software, such as Adobe Photoshop to begin the editing process. Select the "Pen Tool" or "Lasso Tool" to carefully outline your face, ensuring precision and accuracy in the selection process. Take your time to create a clean and smooth selection around your face, avoiding jagged edges or uneven lines.
Take your time to create a clean and smooth selection around your face, avoiding jagged edges or uneven lines.
3. Refine the Selection:
Once you've outlined your face, refine the selection by smoothing edges and adjusting curves to ensure a seamless cutout. Use the "Refine Edge" or "Feather" tool to soften edges and blend the selection with the background. Pay close attention to details such as hair strands or clothing to achieve a natural-looking cutout.
Use the "Refine Edge" or "Feather" tool to soften edges and blend the selection with the background
4. Remove Background:
With your face selected, remove the background from the image to isolate your face on a transparent background. Use the "Delete" or "Layer Mask" function to remove the background, leaving only your face visible. Ensure the edges of your cutout are clean and free from any remnants of the original background.
Use the "Delete" or "Layer Mask" function to remove the background, leaving only your face visible
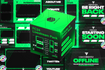
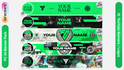
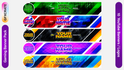
Why not use your face with a template?
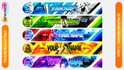
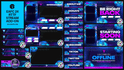
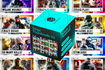
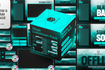
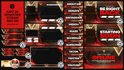
A good alternative to having to create a full thumbnail from scratch is to use design templates instead, these allow you to edit a file which already has designs in it, allowing you to skip most of the high-skilled tasks required such as making the background and text effects.
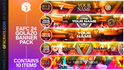
Here at GFXCRATE we offer a wide range of thumbnail templates at affordable prices in packs of 9 or 12. Each pack contains fully editable files which you can download instantly after purchase. These templates will allow you to create professional quality thumbnails without the need for lots of time or design skills.

5. Resize and Position:
Resize and position your cutout face within the thumbnail canvas to create a visually appealing composition. Consider the overall layout and balance of the thumbnail, ensuring your face is prominently featured and aligned with other elements such as text or graphics. Experiment with different placements and sizes to find the most effective arrangement.
Consider the overall layout and balance of the thumbnail, ensuring your face is prominently featured
6. Add Supporting Elements:
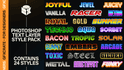
Enhance your thumbnail, add supporting elements such as text, graphics, or overlays that complement your face and convey additional information or context about the video. Use bold fonts, contrasting colors, and eye-catching graphics to draw attention to key details and encourage clicks.
add supporting elements such as text, graphics, or overlays that complement your face
7. Review and Refine:
Take a step back and review your thumbnail design to ensure it effectively communicates the content of your video and aligns with your branding. Pay attention to details such as readability, visual balance, and overall cohesiveness. Make any necessary adjustments or refinements to optimize the thumbnail for maximum impact.
review your thumbnail design to ensure it effectively communicates the content of your video
8. Save and Export:
Once you're satisfied with your thumbnail design, save the file in the appropriate format (e.g., JPEG or PNG) and resolution (1920x1080). Save a copy of the thumbnail for future reference or editing.
save the file in the appropriate format (e.g., JPEG or PNG) and resolution (1920x1080)
Conclusion:
By following this step-by-step guide, you can confidently cut out your face and seamlessly add it to a YouTube thumbnail, creating visually compelling and engaging thumbnails that captivate viewers and drive clicks. Experiment with different editing techniques and design elements to create thumbnails that effectively represent your content and enhance your personal branding on YouTube. With practice and attention to detail, you'll master the art of thumbnail creation and elevate the success of your channel in no time.